Introduction
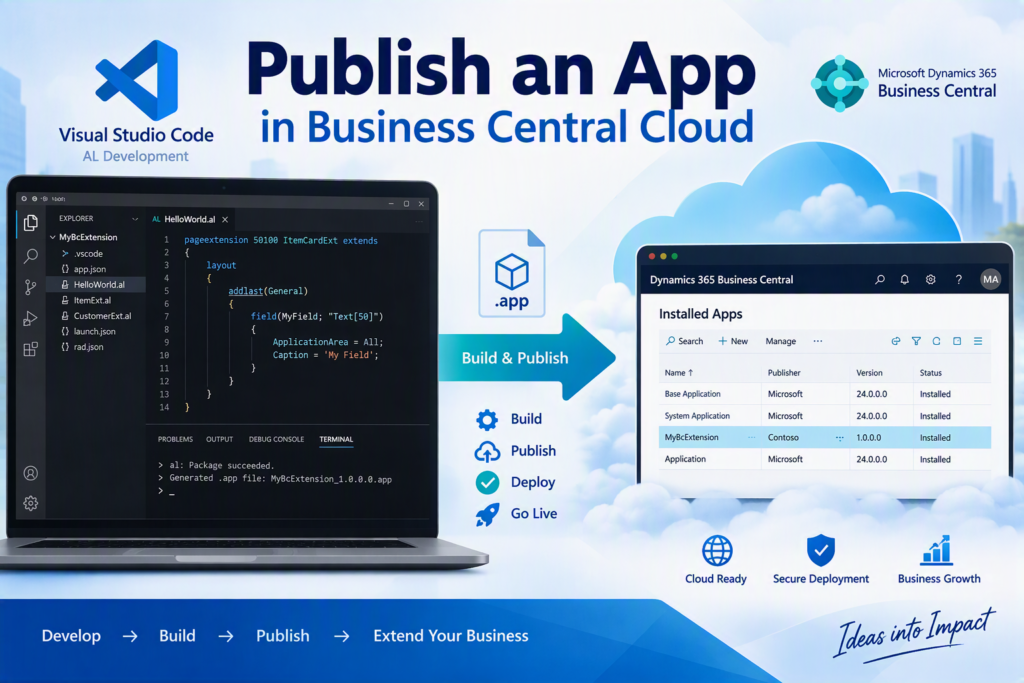
Microsoft Dynamics 365 Business Central allows developers to extend standard functionality by creating AL extensions, also known as apps. After developing and testing an extension, the next step is to publish it to a Business Central Online environment so that users can access the new functionality.
In this guide, you will learn how to publish an app in Microsoft Dynamics 365 Business Central Cloud using Visual Studio Code and the Extension Management page. You will also learn how to upload a compiled .app file, verify the installation, update an existing extension, and troubleshoot common deployment errors.
This tutorial focuses on Business Central SaaS (Online) environments and is intended for AL developers, technical consultants, and implementation partners.
Prerequisites
Before publishing an AL extension to Business Central Online, make sure you have the following:
-
An active Microsoft Dynamics 365 Business Central Online environment.
-
A sandbox environment for development and testing.
-
Visual Studio Code installed on your computer.
-
The AL Language extension installed in Visual Studio Code.
-
A valid AL project with an
app.jsonfile. -
Appropriate permissions to publish or upload extensions.
-
A compiled
.apppackage if you plan to upload the extension manually.
Important:
Always test your extension in a sandbox environment before deploying it to a production environment.
Method 1: Publish a Business Central App Using Visual Studio Code
Visual Studio Code is the standard development environment for building, publishing, and debugging AL extensions in Business Central.
Step 1: Open Your AL Project
Open your Business Central AL project in Visual Studio Code.
Make sure your project contains the required files, including:
-
app.json— Contains the extension metadata, ID, name, publisher, version, and dependencies. -
launch.json— Contains the environment and publishing configuration. -
AL source files (
.al) — Contain the extension’s code and objects.
Step 2: Configure the Business Central Cloud Environment
Open the .vscode/launch.json file and configure the target Business Central sandbox environment.
Example configuration:
					{
    "name": "Microsoft cloud sandbox",
    "type": "al",
    "request": "launch",
    "environmentType": "Sandbox",
    "environmentName": "sandbox",
    "breakOnError": "All",
    "launchBrowser": true,
    "enableLongRunningSqlStatements": true,
    "enableSqlInformationDebugger": true
}
Update environmentName to match your target environment. For example, if your sandbox is named Sandbox-Development, use that exact environment name.
The environmentType property identifies the target as a sandbox. Use the appropriate configuration if your deployment process targets another environment.
Step 3: Download Business Central Symbols
In Visual Studio Code, open the Command Palette using Ctrl + Shift + P.
Search for and run: AL: Download Symbols
Authenticate with your Microsoft work or school account when prompted.
Visual Studio Code downloads the symbols required to compile your extension against the selected Business Central application and its dependencies.
If the download fails, verify the environment name, account access, and AL project configuration.
Step 4: Compile the AL Extension
Before publishing, compile your AL project to identify any errors.
Use the following shortcut to build the project: Ctrl + Shift + B
Alternatively, open the Command Palette and run the AL build command.
Resolve any compilation errors before proceeding. A successful build generates an .app package in the configured output directory, commonly the project’s output folder.
Step 5: Publish the App to Business Central Sandbox
To publish and run the extension directly from Visual Studio Code, press F5.
Visual Studio Code builds and publishes the extension to the configured environment and starts a debugging session. If launchBrowser is enabled, the Business Central client opens in your browser.
This method is useful for development and debugging.
After publishing, verify that the extension works as expected in the sandbox.
Tip:
Use Ctrl + F5 to publish and run the extension without starting a debugging session, when supported by your AL development setup.
Method 2: Upload an APP File Using Extension Management
If you already have a compiled .app file, you can upload it through the Business Central web client instead of publishing directly from Visual Studio Code.
This method is useful for transferring a tested extension package between environments or deploying an extension prepared by another developer.
Step 1: Open Extension Management
-
Sign in to your Business Central Online environment.
-
Use the search icon to find Extension Management.
-
Open the Extension Management page.
Step 2: Upload the Compiled APP File
On the Extension Management page:
-
Select Manage.
-
Choose Upload Extension.
-
Browse to the location of your compiled
.appfile. -
Select the file and confirm the upload.
-
Follow the prompts to deploy the extension.
The exact prompts and options may vary depending on the Business Central version and extension package.
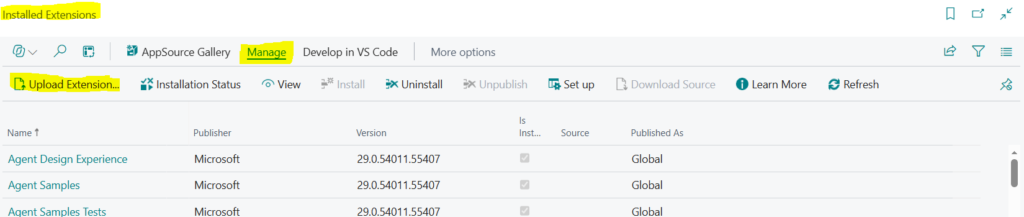
Note:
Uploading an extension and making it available to users are distinct concepts. Follow the deployment prompts and verify that the extension is installed successfully.
Step 3: Check the Installation Status
After uploading the package, open Extension Management and verify the extension’s status.
Confirm that:
-
The correct extension name and version are displayed.
-
The extension is installed successfully.
-
No deployment or installation errors are reported.
-
The extension’s functionality is available to the intended users.
How to Verify an App After Publishing
After publishing an app to Business Central Cloud, perform the following checks:
-
Open Extension Management.
-
Confirm the extension name, publisher, and version.
-
Verify that the extension is installed.
-
Open the relevant Business Central pages or features.
-
Test the extension’s business logic.
-
Verify permissions and access for the intended users.
-
Check for errors and confirm that existing functionality continues to work.
For production deployments, perform appropriate testing and follow your organization’s release and rollback procedures.
Common Errors When Publishing a Business Central App
1. Extension Version Already Exists
Cause: The package uses a version that conflicts with an existing published or installed version.
Solution: Check the extension’s current version and update app.json as required. Confirm that the package ID, publisher, and version are appropriate for the intended deployment.
2. Missing Dependencies
Cause: The extension depends on another app that is missing or incompatible with the target environment.
Solution: Review the dependencies section in app.json. Ensure that the required extensions are available in compatible versions before publishing.
3. Insufficient Permissions
Cause: The signed-in user does not have sufficient permissions to upload, publish, install, or deploy the extension.
Solution: Ask your Business Central administrator to review the required permissions and deployment access.
4. Compilation Errors
Cause: The AL project contains code errors, incompatible object references, or missing symbols.
Solution: Download symbols again if necessary, review the compiler messages, correct the AL code, and rebuild the project.
5. Incorrect Environment Configuration
Cause: The environmentName or environmentType setting does not match the intended Business Central environment.
Solution: Review launch.json and confirm that Visual Studio Code is targeting the correct sandbox or production environment.
6. Extension Upload or Installation Fails
Cause: The package may contain incompatible metadata, unsupported dependencies, or changes that fail deployment validation.
Best Practices for Business Central Cloud App Deployment
Follow these recommendations when publishing AL extensions:
-
Use a sandbox first: Validate every extension before deploying it to production.
-
Maintain version control: Keep AL source code and configuration files in a source control system.
-
Use meaningful version numbers: Follow a consistent versioning strategy for each release.
-
Review dependencies: Verify that dependent extensions are available and compatible.
-
Protect production environments: Restrict deployment access to authorized users.
-
Test upgrade scenarios: Validate data and schema changes before releasing a new version.
-
Document deployments: Record the package version, environment, deployment date, and test results.
-
Plan for failures: Maintain an appropriate recovery strategy for production deployments.
Conclusion
Publishing an app to Microsoft Dynamics 365 Business Central Cloud is an important step in delivering custom functionality to business users.
You can use Visual Studio Code to publish and debug extensions during development, or use Extension Management to upload a compiled .app package. For existing extensions, maintain proper versioning and validate upgrade requirements before deploying a new release.
By following these steps and applying the recommended deployment practices, developers can publish, verify, and maintain Business Central extensions more reliably.
For more Microsoft Dynamics 365 Business Central development and functional tutorials, explore the technical and functional insights available on MSDNKR.com.